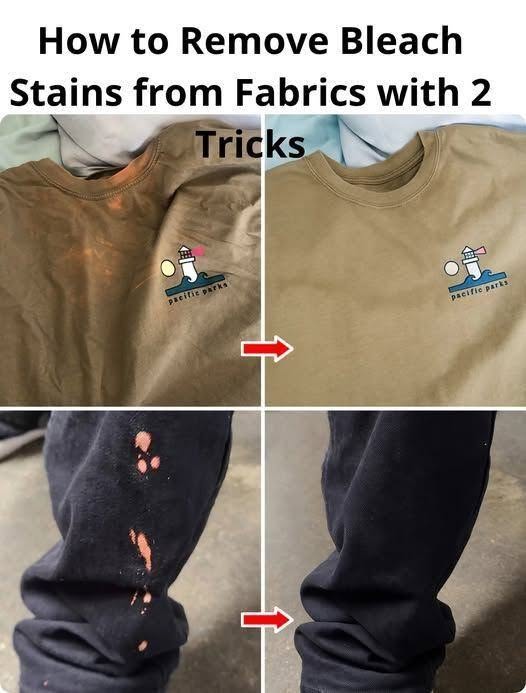
Bleach stains are tricky because they don’t actually “stain” fabric—they remove the color permanently. So the goal isn’t true removal, but repairing or hiding the damage.
Here are 2 practical tricks that actually work:
🧴 Trick 1: Color restoration (best fix for small stains)
This works when the bleach spot is small.
What you need:
- Fabric dye (matching your clothing color) or permanent fabric marker
- Cotton swab or small brush
- Cold water
How to do it:
- Wash and dry the fabric first.
- Lightly dampen the bleach spot.
- Apply fabric dye carefully using a cotton swab.
- Blend edges so it matches surrounding color.
- Let it dry completely.
- Wash gently after 24 hours.
💡 Best for: cotton shirts, jeans, colored clothes
🎨 Trick 2: “Color camouflage” (creative fix)
If perfect matching isn’t possible, hide the stain instead of fixing it.
Options:
- Use fabric marker to blend the area darker
- Add a patch, embroidery, or design
- Turn it into a style feature (tie-dye effect or pattern)
How to do it:
- Identify the bleach spot.
- Either:
- Draw small pattern over it, or
- Stitch a patch over it, or
- Blend with darker marker strokes
💡 Best for: visible stains, larger bleach spots
⚠️ Important truth
- Bleach damage cannot be “washed out”
- The fabric fibers are permanently decolored
- Only recoloring or covering works
🧠 Bonus tip
For future accidents:
- Always rinse bleach immediately with cold water
- Neutralize with a little baking soda solution to stop spreading
If you want, tell me the fabric type (cotton, jeans, black shirt, etc.), and I can suggest the best exact method for that specific clothing item.